Adding and Managing Tenants
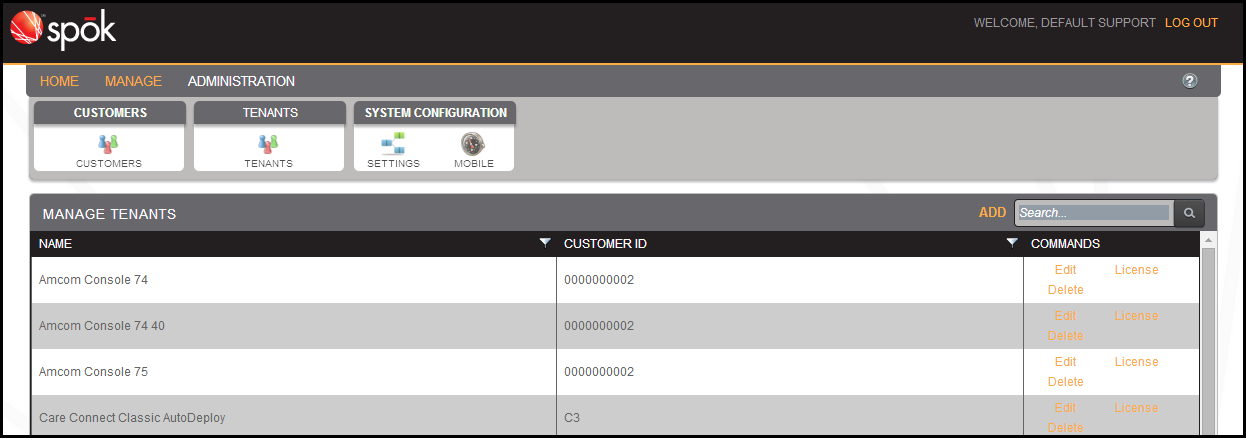
You can view, add, edit, license, and delete tenants on the Manage Tenants page. To get to the Manage Tenants page, navigate to Administration > Tenants > Tenants in the Spok Hosted Administration interface.
A customer is anyone who has purchased Spok products. A customer will usually be a hospital or a network of hospitals.
Tenants are below customers in organizational structure, and represent a layer of data between a customer and a site. Tenants represent multiple customer sites, such as an entire hospital organization composed of multiple hospitals, each of which is a site.
Sites are specific geographic locations that compose tenants and cutomers.
Customers cannot see their own customer names, but they can view their tenant names. The customer name is used for Spok accounting and financial purposes.
Tenants in the Spok Hosted Administration system represent multiple sites. For example, tenants can represent entire hospital organizations that are made up of smaller geographic locations called “sites.” More specifically, “Hospital ABC” could have an “ER Building” and an “OBGYN Building.” In this situation, “Hospital ABC” would be the tenant because it is the larger organization structure that is made up of multiple sites. The “ER Building” and the “OBGYN Building” are sites within that tenant.
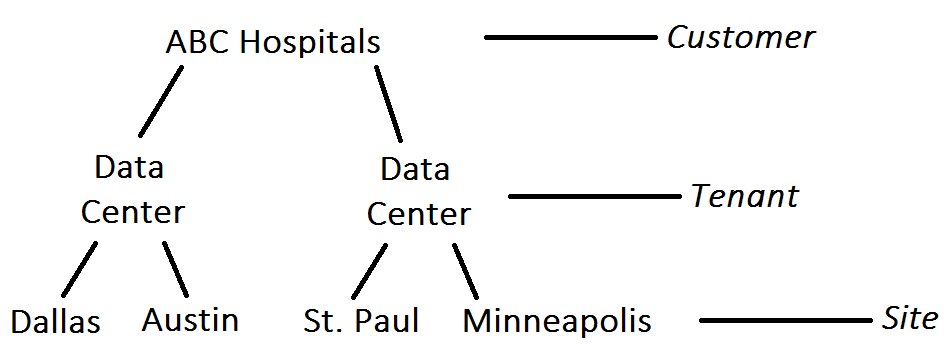
- “ABC Hospitals” purchases Spok Mobile and is added as a customer with the name “ABC Hospitals.” The “ABC Hospitals” customer includes an entire network of hospitals, and manages the data for all of its hospital locations in two separate data centers. These two data centers are considered the tenants, and their data is managed on the Manage Tenants page. Each individual hospital run by ABC Hospitals is a site, and each site is associated with the appropriate tenant.
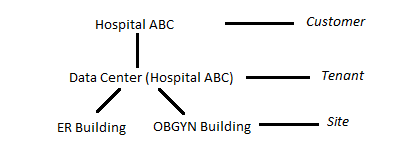
- “Hospital ABC” purchases Spok Mobile and is added as a customer with the name “Hospital ABC.” The “Hospital ABC” customer has only one geographic location, but this location has multiple buildings; the customer will also be managing its site data in a single data center. The data center that stores each building's data is considered a tenant, and is added as a tenant on the Manage Tenants page with the same name as the customer. Each building at the physical “Hospital ABC” location, such as the ER Building and the OBGYN Building, is its own site, and each site is associated with the “Hospital ABC” tenant.
Using the Tenant Grid
The Manage Tenants screen displays the tenant grid, which contains the list of available tenants that are currently being managed in the system. The grid can be refreshed, searched, rearranged, and reordered.
To view the tenant grid, navigate to Administration > Tenants > Tenants from the Spok Hosted Administration interface.
For more information about the tenants grid, see Getting Started.
Adding Tenants
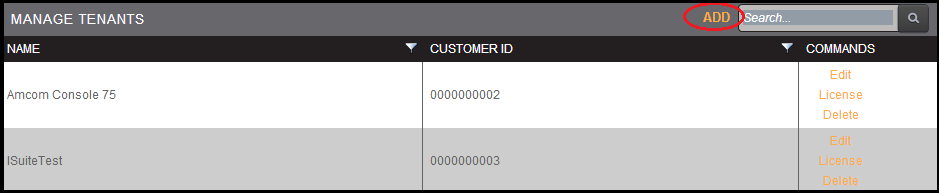
To add a new tenant, do the following:
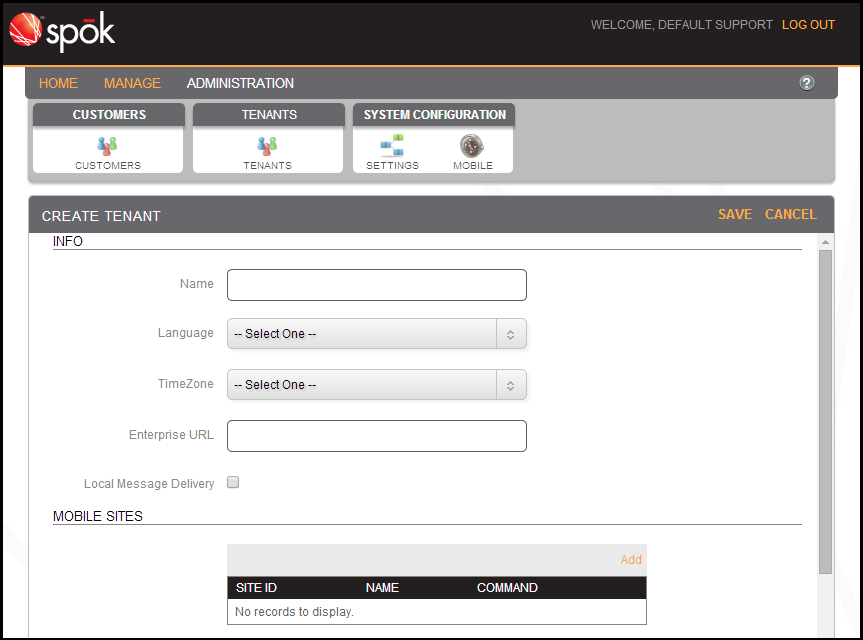
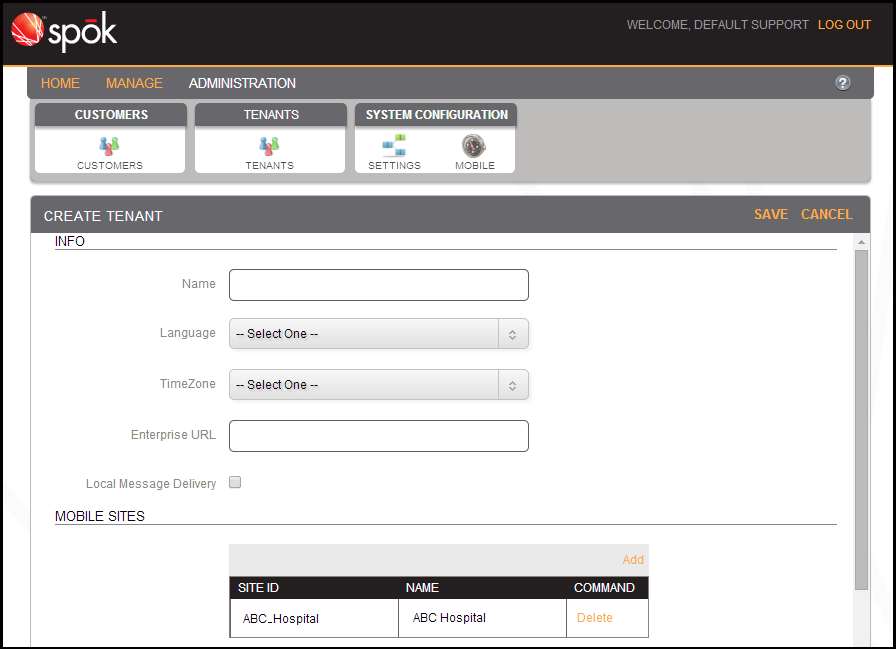
- On the Manage Tenants screen, click Add. The Create Tenant screen will appear.
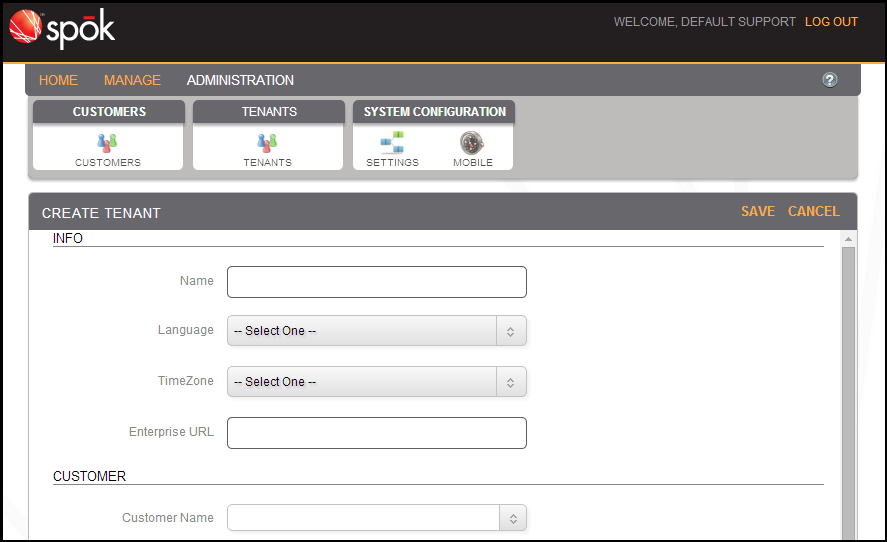
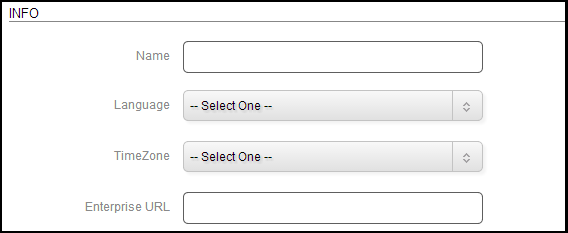
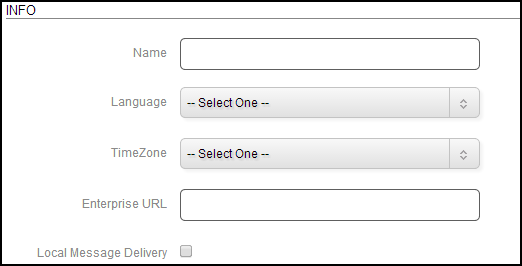
- In the Name field, enter a name for the tenant. The tenant name must be unique.
- From the Language drop-down box, select the language that the tenant should use. The options are: Bulgarian, English, French, German, Italian, and Spanish.
- From the TimeZone drop-down box, select the time zone that the tenant should use. The time zone is assigned by default to user profiles when a new profile is created.
- In the Enterprise URL field, enter the fully qualified domain name (FQDN) or IP address of the customer’s Premise system.
- From the Customer Name drop-down menu, select the appropriate customer. To filter the list, begin typing the customer name. The list will filter out any options that don’t match your entry.

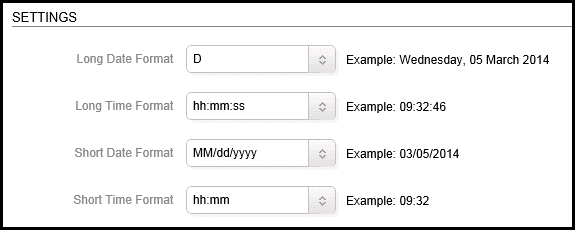
- From the Long Date Format and Long Time Format fields, select the long date and time formats.
- The long date format includes the day, month abbreviation, and full year (for example, 25 Feb 2014).
- The long time format includes the hour, minutes, and seconds, as well as AM or PM notation (for example, 1:22:24 AM).
- From the Short Date Format and Short Time Format fields, select the short date and time formats.
- The short date format includes the day, month, and year in number format only (for example, 02/25/2014).
- The short time format includes only the hour and minutes (for example, 01:22).
Some time options have “tt” included in the format option. The “tt” is converted to a.m./p.m. notation.
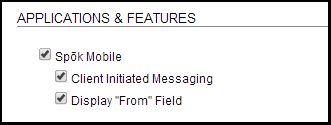
- Scroll down to the Applications and Features section.
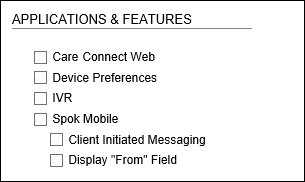
- If this tenant has purchased Spok Mobile, enable the Spok Mobile option.
- Enable the Client Initiated Messaging option to allow the devices at the site to send Spok Mobile messages to other devices with Spok Mobile. If this option is disabled, users will not be able to initiate messages to other Spok Mobile application users. Instead, they will only be able to respond to incoming messages on their devices. This option must be purchased by the site before it can be enabled.
- Enable the Display “From” Field option to allow the devices at the site to display a From field at the top of incoming Spok Mobile messages, which displays the name of the message sender. If this field is disabled, users will not see the message sender's name. This option must be purchased by the site before it can be enabled.
- Add sites to this tenant if necessary.
Adding Sites
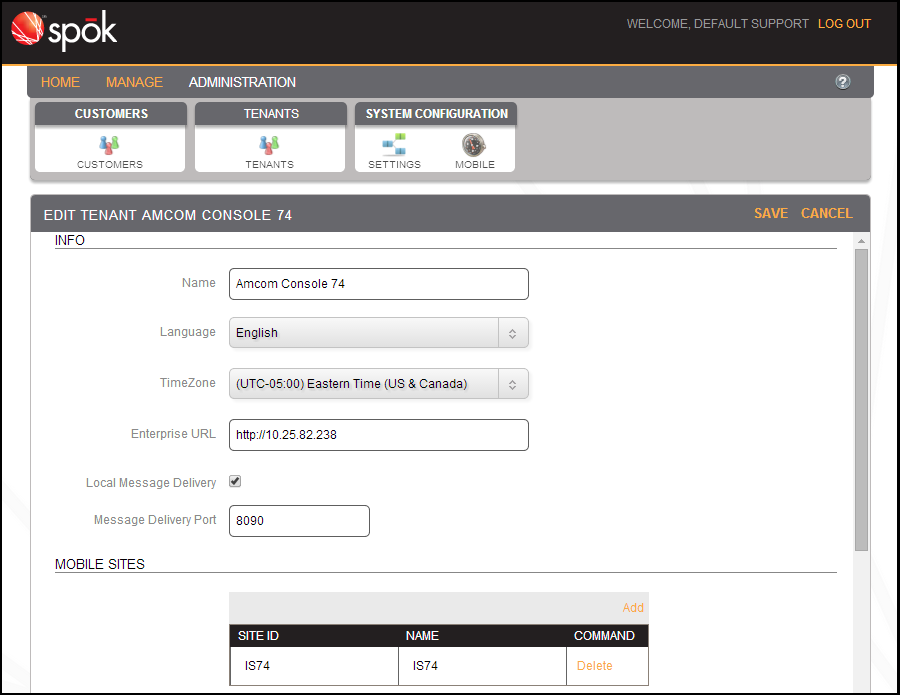
You can add sites to the Spok Mobile configuration in the Configuration screen. When you select the Local message delivery option, the Host System URL field will be displayed. For detailed information about the Host System URL field, see Editing System Settings.
Depending on which type of message delivery is selected in the Message Delivery drop-down menu, the Site List section may include an additional field.
- Navigate to the Mobile Sites section in the Create Tenant screen. Note that the Spok Mobile checkbox must be selected in order for this section to appear.
- In the Mobile Sites section, click Add. A new, editable row will appear.

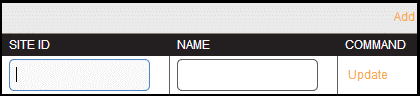
- In the Site ID field, enter a unique site ID name for the new site. The Site ID is used to determine which customer sites will be supported in Spok Mobile Server. Multiple customer site IDs can be added for an installation if it supports multiple host systems. The site ID that is set up on the Spok Enterprise Administration page must match this value. For more information about how to set this up, see Implementing Spok Mobile 4.6.
- In the Name field, enter a unique name for the new site. This name will appear on Spok Mobile devices.
- To add the new site to the list, click Update.
Editing Sites
To edit existing sites in the system, do the following:
- Navigate to the Mobile Sites section on the Create Tenant screen.
- Click on the Site ID that you would like to edit. The fields will become editable and an Update button will appear next to the site fields.

- Edit the desired information.
- Click Update next to the record that you have edited to save your changes.
Deleting Sites
To remove existing sites from the system, do the following.
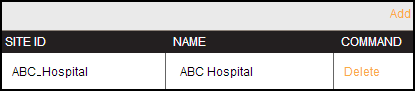
- Navigate to the Mobile Sites section on the Create Tenant screen.
- Click Delete next to the site that you would like to remove. A confirmation dialog will appear.
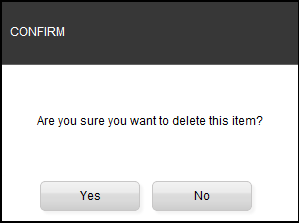
- Click Yes to remove the site from the list.
- (Optional) Enable the Local Message Delivery option.
- Note that the following options are selected by default, but can be disabled.
- The Client Initiated Messaging option allows Spok Mobile devices to send Spok Mobile messages to other Spok Mobile devices. If this option is disabled, users will not be able to initiate messages to other Spok Mobile users. Instead, they will only be able to respond to incoming messages. Client-initiated messaging can only be used if local message delivery is selected.
- The Display “From” Field option allows Spok Mobile devices to display a From field at the top of incoming Spok Mobile messages, which displays the sender's name. If this field is disabled, users will not be able to see the sender's name when they receive messges.
- Click the Save link at the top of the screen to save your changes.
Editing Tenants
Existing tenants can be edited in the system.
- In the Spok Hosted Administration interface, choose the Administration|Tenants|Tenants menu option. The Manage Tenants screen displays, showing the tenant grid.

- In the Manage Tenants screen, click the Edit link next to the appropriate tenant. The Edit Tenant <Tenant Name> screen displays.

- Change the information as needed. For more information on these fields, please refer to Adding and Managing Tenants.
- Click the Save button to save your changes.
Deleting Tenants
To delete tenants from the system, do the following:
- In the Spok Hosted Administration interface, navigate to Administration > Tenants > Tenants to view the Manage Tenants screen, which contains the tenant grid.
- From the list of available tenants, find the tenant you would like to delete.
- Click the Delete link next to the appropriate tenant. A warning dialog will appear.

- Click Yes to delete the tenant.