Editing System Settings
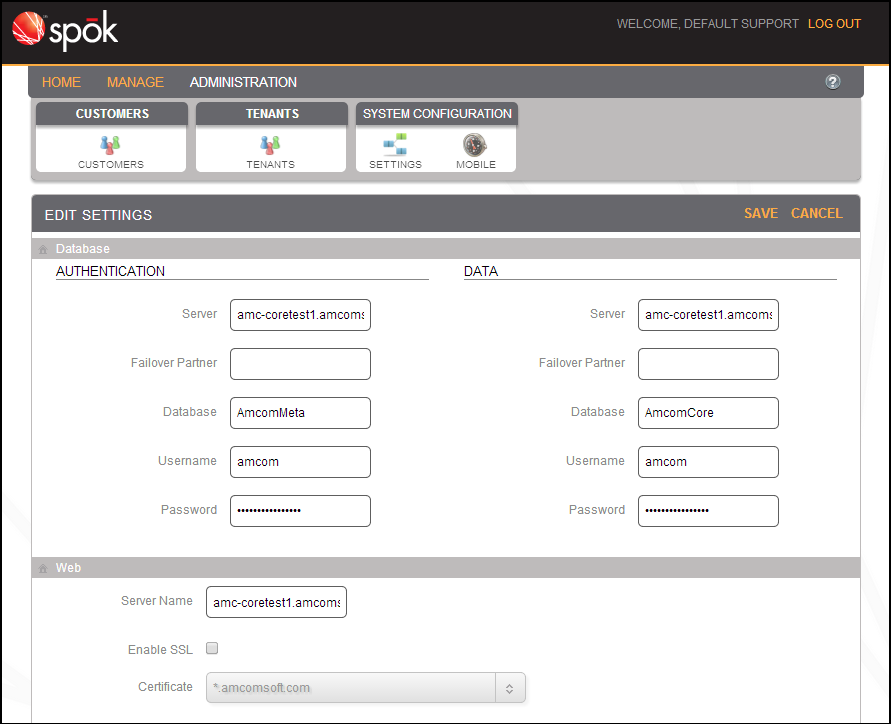
The Edit Settings page allows users to configure the connection information to the Authentication database and the Data database. On this page, you can also set the hostname or IP address of the server, as well as determine whether the server will use HTTP or HTTPS.
To edit the system settings, navigate to Administration > System Configuration > Settings to view the Edit Settings screen.
Database Settings
Authentication
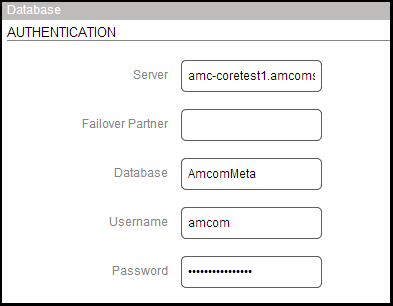
The Authentication portion of the Database section allows you to configure the database that stores data for authenticating users and servers.
- In the Server field, enter the IP address or fully qualified domain name of the database instance whose authentication information you would like to store.
- In the Failover Partner field, enter the database hostname or IP address used for SQL Mirroring.
- In the Database field, enter the name of the database that you are configuring. The default and preferred database name is
AmcomMeta. - In the Username field, enter the username that is linked to the database that you entered in the Database field. Please note that this user must have permission to create, read, update, and delete data from the database.
- In the Password field, enter the password that is linked to the username that you entered in the Username field. The information in this field will be used to access the database.
Data
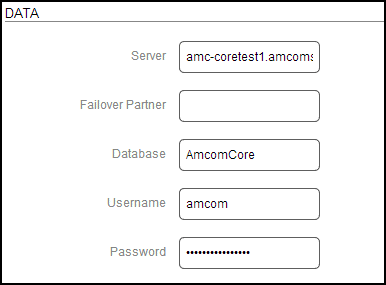
The Data portion of the Database section allows you to configure the database that stores tenant-specific data for the system.
- In the Server field, enter the IP address or fully qualified domain name of the database instance whose tenant-specific data you would like to store.
- In the Failover Partner field, enter the database hostname or IP address used for SQL Mirroring.
- In the Database field, enter the name of that database that you are configuring. The default and preferred database name is
AmcomCore.NOTE: Changing this name does not migrate the database to the new name. - In the Username field, enter the username that is linked to the database that you entered in the Database field. Please note that this user must have permission to create, read, update, and delete data from the database.
- In the Password field, enter the password that is linked to the username that you entered in the Username field. The information in this field will be used to access the database.
Web Settings
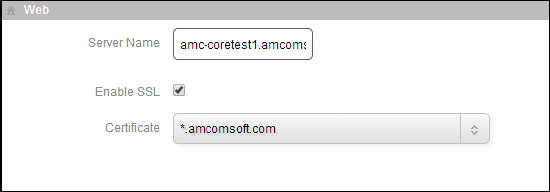
The Web portion of the Edit Settings screen allows you to configure the web portion of the Spok Server.
- In the Server Name field, enter the fully-qualified domain name of the server that is used on the network. You can also enter an IP address in this field. If you enter an IP address, the Enable SSL option will be disabled.
The Server Name value must match the value in the Message Download URL field in the Spok Mobile configuration section. Please note that if you edit this field and save your changes, the information in the Message Download URL field will be automatically updated. - The Enable SSL option allows you to configure whether the system uses HTTPS when communicating with the Authentication Services or website. Choose one of the following options:
- Enabled: HTTPS can be used. When HTTPS is used, information can be sent and received securely in the system. When this option is enabled, the Certificate drop-down field becomes available.
- Disabled: HTTPS cannot be used. When HTTPS is not used, information is not sent and received securely in the system. When this option is disabled, the Certificate drop-down field will be disabled.
- From the Certificate drop-down menu, select a certificate. The Certificate menu is only available if the Enable SSL option is enabled. The certificate must be installed and registered on the web server.
- When you are finished making changes, click Save to save your changes.