Running the Care Connect Suite Installer
Using the Care Connect Suite Installer
The Care Connect Suite installer is used to install or perform upgrades of Spok Care Connect Suite 1.9 components.
At the end of installation, you must provide an XML license file that activates features. Be sure to have this XML license available before starting the installation process.
-
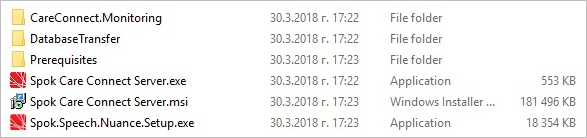
Navigate to the Spok Care Connect installation media.
Spok Care Connect Server.exe, Spok Care Connect Server.msi, and the Prerequisites folder must reside in the same location.
-
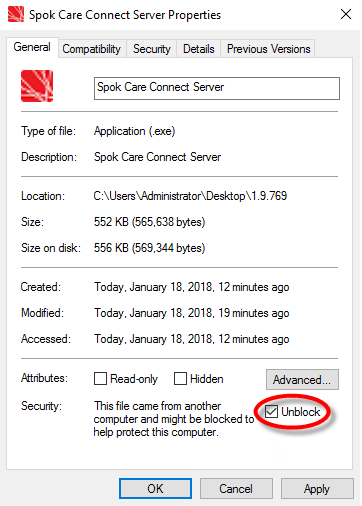
Right-click Spok Care Connect Server.exe and click Run as Administrator.
-
In the Spok Care Connect Server Setup window, click Install.
If there are missing prerequisites that need to be installed, you will be notified or the program will install them at this time.
If a message appears that states Setup Successful – The computer must be restarted in order to continue, click Restart. The installer will restart the computer and resume installation after the system is back up.
-
When the Welcome to the Spok Care Connect Setup Wizard message displays, click Next to continue to the Custom Setup window.
-
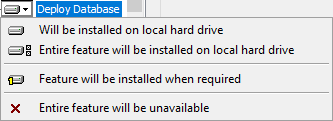
Select the features to install for the current system.
-
(Optional) If necessary, you can manually configure where features are installed.
-
After your selections are made, click Next.
-
In the Database Configuration dialog, configure the available fields with the following information:
If the Deploy Database option was not selected on the Custom Setup dialog, the Database Configuration dialog will only have the Server field available. See Running SQL Scripts Outside of the CCS Installer for more information.

-
Server—Enter the SQL Server name or IP address.
If there is an instance, add a backslash and the instance name after the server name. For example: 10.25.22.33. Be very careful with your entry in this field when installing a mirror server during an upgrade. The Test Connection function does not test for the mirror server and will not catch errors in this field. -
Database—Enter the name of the database that is being used in the new system. The field auto-populates the default name “master”. When you install Spok Mobile or Care Connect Speech, this field must always point to the Care Connect Suite database server.
-
Integrated Security—Select this option to use the current Windows user account to access the SQL Server database during installation. The Windows user account must have "sysadmin" rights.
-
Username—Enter the user name linked to the server. The username entered in this field must have “sysadmin” rights. For example: spokadmin. This user will be used during installation only.
-
Password—Type the password linked to the username. The password entered in this field must be linked to a user that has “sysadmin” rights.
-
-
Click Test Connection to attempt to connect to the server database with the user credentials you provided. If the connection was successful, the Ready to install Care Connect dialog appears.
-
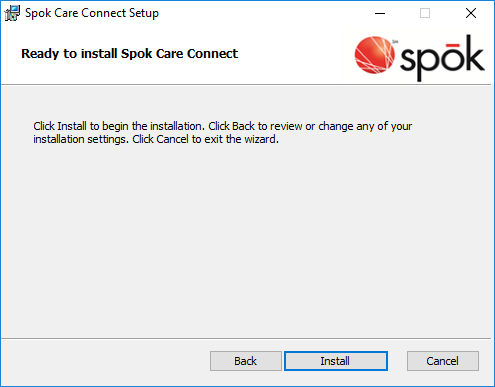
In the Ready to install Care Connect dialog, click Install. The installer makes all of the necessary configurations to IIS and deploys the application directly to IIS.
-
Click Finish when the installation is complete. The Setup Successful dialog displays, but you will still need to import the license file.
Importing a License File
If you installed Platform components, the Import License page will automatically open in a browser at the end of installation. It may also appear when you access the administrative interface for the first time.
If the Import License page does not automatically display in either of these scenarios, or you need to access it to re-import a license file, you can access it at the following URL: http://IP_ADDRESS/Web/Public/Home/ImportLicense.
The license file for your tenant must be imported into the client system before you can sign in. After this file is uploaded to the client system, each client will have the appropriate permissions.
-
Access the Import License page.
You can access it at the following URL:http://IP_ADDRESS/Web/Public/Home/ImportLicense. -
Click Browse to search for the license file.
Spok’s Maintenance department will provide this license file.

-
Browse to the appropriate XML license file.
The name of the XML file should include the tenant name. For example, if the tenant name is “ABCHospital,” the XML file that should be chosen might be named “ABCHospital.xml”. -
Click Upload to upload the XML license file.
-
If the upload was successful, a success message will appear, which includes the username needed to sign in. Write the username down and click Finish.
Updating the Configuration Service URL
The Configuration Service URL is updated using the Config Manager. The Config Manager appears in a web browser when the Care Connect Suite Installer successfully installs any of the following features:
- Platform: Web Site, Web Service, Adapter Service
- Mobile: Web Site, Web Services, Windows Services
- Web: Web Site, Web API Service
- Device Preferences: Web Site
- Speech: Speech Service
- CTI: CTI Server Service
The Config Manager will also display the first time you log in to the Administrative interface. The Platform Server Name or IP page will display after login if IIS detects that a connection to the current configuration service cannot be made. You will need to enter a valid configuration service URL in order to continue to the Administrative pages.
If the Platform Server Name or IP page does not automatically display or you need to access it to update the URL, you can access it at the following URL: http://IP_ADDRESS/ConfigManager/
- If this page does not automatically appear in a web browser (or you want to return to it), navigate to
http://IP_ADDRESS/ConfigManager/. - In Platform Server Name or IP, enter or edit the address of the Platform Config Service, ensuring that it now points to the correct address if necessary. Select https if needed.
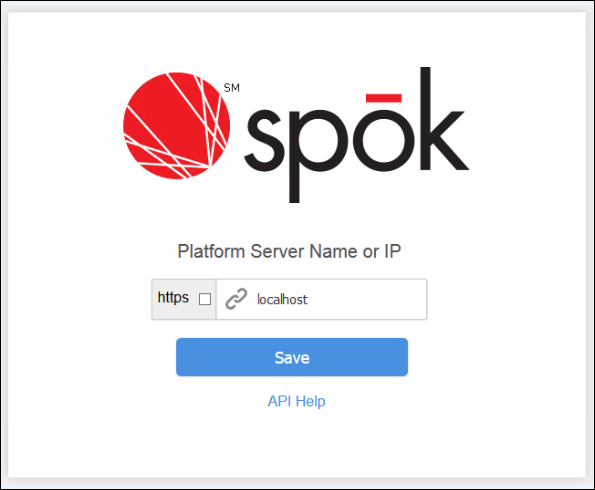
- Click Save.
The system will test whether the server name or IP address has been changed successfully, or if the change has failed for some reason. If the connection to the configuration service has failed, check your server name or IP for errors and try again. In order to proceed with implementation, you must save a valid configuration service URL. - Restart IIS on all Care Connect application and Platform servers before continuing with any further configuration.
- To restart IIS, open a new Command Prompt or PowerShell instance.
- Type iisreset, and press Enter.
- IIS successfully restarted.
- Repeat the IIS restart step on all Care Connect application and Platform servers before continuing with any further configuration.
Troubleshooting and Tips