Messaging Settings
The message settings in the Spok application allow you to configure message templates and call systems, dictate if your device automatically downloads received pictures and videos, and dictate if you receive notifications when users reply to your messages.
Some configuration options may prevent different settings from being editable on your device. If a settings option cannot be edited on the device, the site administrator controls the settings option. In this situation, the setting is grayed out and cannot be configured within the mobile application.
Message Templates
The message template feature is used to create a set of standard messages that allow you to use previously configured text to reply to messages or send new messages. For detailed information on how to create, edit, delete, and use message templates, please refer to Message Templates.
Auto Load Attachments
Enabling the Auto Load Attachments option allows your device to automatically download all received images and videos that are included in received messages. For example, if you receive a Spok Mobile message that includes a picture and a video, the picture and video are automatically downloaded when the message is received if the Auto Load Attachments settings option is enabled. If the option is disabled, the video and the picture would not be automatically downloaded when the message is received. It is important to note that enabling this feature can affect your cellular data usage.
- In the Spok Mobile application, click the drawer button. The drawer displays.
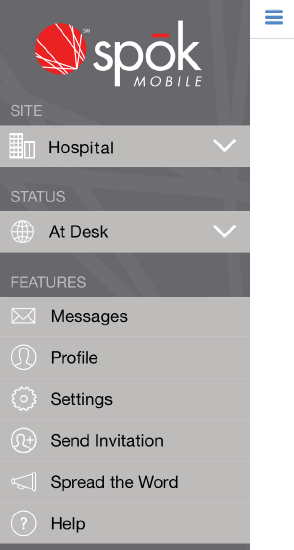
- In the drawer, click the Settings option. The Settings screen displays.
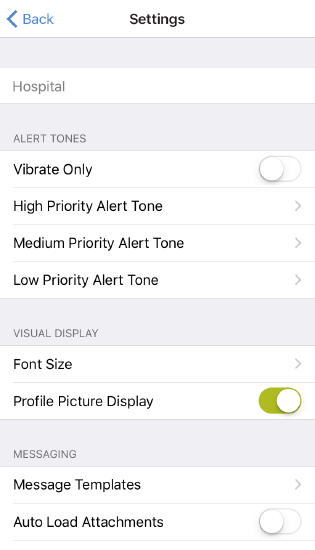
- Enable the Auto Load Attachments option if you would like the Spok Mobile application to automatically download pictures and videos that are included in received Spok Mobile messages.
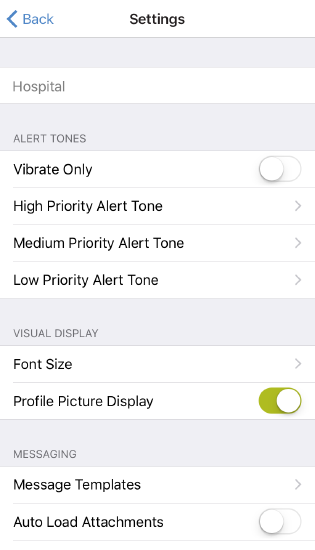
The change is automatically saved.
Message Delivery Notifications
The Message Delivery Notifications feature allows you to decide if you receive notifications when the following events occur:
- A message fails to send to the message receiver(s)
- A message is successfully delivered to the message receiver(s)
- A message is acknowledged by the message receiver(s)
- A message is ignored by the message receiver(s)
To configure the Message Delivery Notification setting for the Spok Mobile application, perform the following steps:
- In the Spok Mobile application, click the drawer button. The drawer displays.
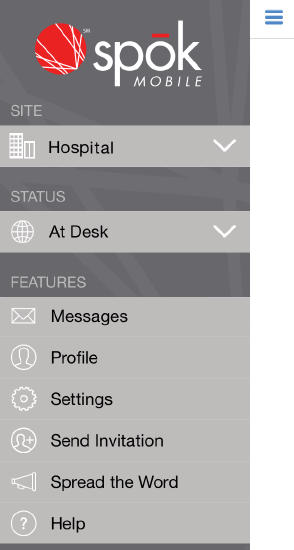
- In the drawer, click the Settings option. The Settings screen displays.
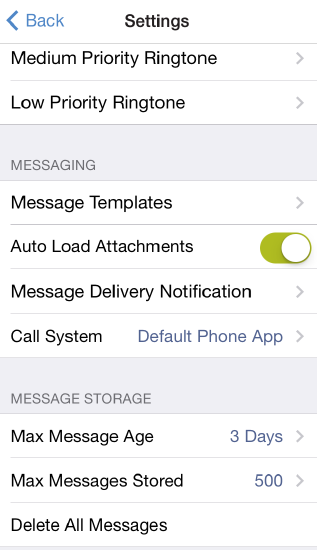
- Choose the Message Delivery Notifications option. The Notifications For screen displays.
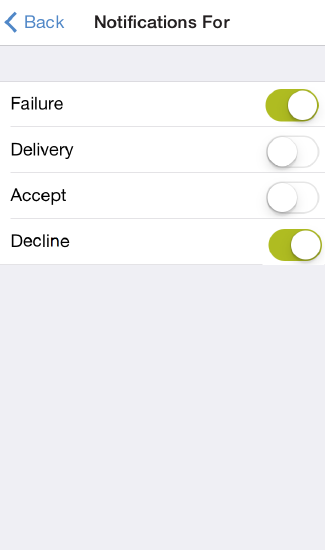
- Configure the following information:
|
Failure |
|
|
Delivery |
|
|
Accept |
|
|
Decline |
|
The changes are automatically saved.
Call System
The Call Systems feature in the Settings tab allows you to set up your Spok Mobile device for use with a VoIP client. This allows you to initiate a phone call over a VoIP connection using the Spok Mobile application. For example, if you receive a Spok Mobile message on your device that includes a call back number, your Spok Mobile device can perform a call back to the number over a VoIP connection if the VoIP connection is configured in the Call Phone Systems screen.
- In the Spok Mobile application, click the drawer button. The drawer displays.
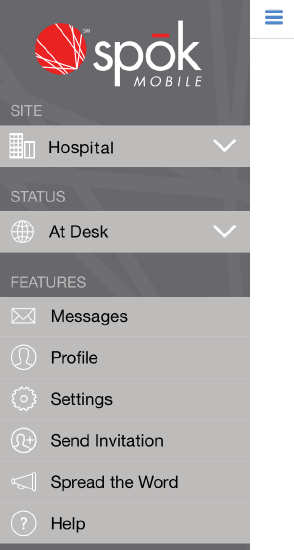
- In the drawer, click the Settings option. The Settings screen displays.
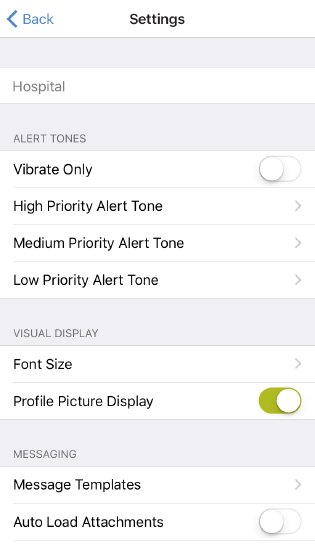
- Click the Call System setting option. The Call System screen displays.
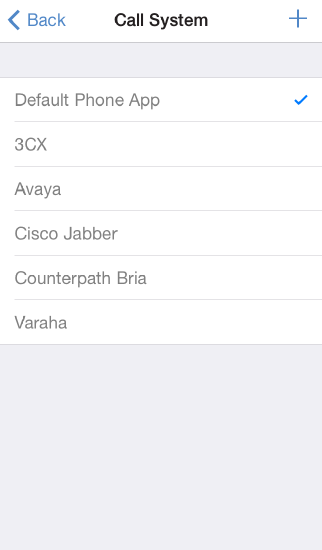
- Click the + button. The Add Provider screen displays.
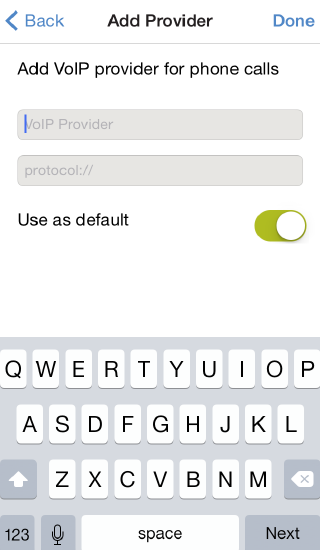
- In the VoIP Provider field, enter a name to describe the VoIP system that is being entered. After this information is saved, the name of the VoIP provider displays in the Call System screen.
- In the Protocol:// field, enter the protocol for the call system (Example: skype://).
- Choose one of the following options from the Use as default field:
- On: Choose the On option if you would like to use the entered call system as the default call system for the device.
- Off: Choose the Off option if you would not like to use the entered call system as the default call system for the device.

- When the desired information is entered, click Done .