Setting Up the Application
The Spok Mobile application can be set up in three different ways on your device: with an existing registration, with an invitation, and without an existing registration or invitation.
If you received an email from Spok Mobile indicating that you have been registered to a site, this means that a site registered your device in its host system. In this situation, please perform the steps in the Setting Up the Application with an Existing Registration section.
If you received an email invitation to join the Spok Mobile application, this means that someone invited you to join the application. In this situation, please perform the steps in the Setting Up the Application with an Invitation.
If you have not received an email from Spok Mobile indicating that you have been registered to a site or that you have been invited to join the application, this means that you have not been registered to a site and no one has invited you to join the application. In this situation, please perform the steps in the Setting Up the Application without an Existing Registration or Invitation.
Setting Up the Application with an Existing Registration
If you received an email from Spok Mobile indicating that you have been registered at a site, it means that a site registered your device in its host system. This email includes your registration username and password that is entered after you download and install the application. If you received an email from Spok Mobile, perform the following steps to set up Spok Mobile on your device:
- You receive an email from Spok Mobile. This information includes your registration username and password that are used to register your device.
- Download and install the application on your device. This can be done by clicking the download link in the email that you receive from Spok Mobile. This can also be done by manually downloading the application from the Apple Application store. For detailed information on how to do this, please refer to How to Download and Install the Application.
- Access the application on your device. This can be done by clicking the Spok Mobile icon on your device’s home screen.
- Register the application on your device. For detailed information on how to do this, please refer to How to Register the Application.
Setting Up the Application with an Invitation
If you received an email indicating that you were invited to sign up for Spok Mobile, perform the following steps to set up Spok Mobile on your device:
- You receive an email from Spok Mobile, indicating that someone has invited you to use Spok Mobile.
- In the email that you receive from Spok Mobile, click the link. The Sign Up for Spok Mobile screen displays.
- In the Sign Up for Spok Mobile screen, enter your email address.
- After your email is entered, click Sign Up . You receive an email from Spok Mobile that includes your registration username and password that are used to register your device.
- Download and install the application on your device. For detailed information on how to do this, please refer to How to Download and Install the Application.
- Register the application on your device. For detailed information on how to do this, please refer to How to Register the Application.
Setting Up the Application without an Existing Registration or Invitation
If you did not receive an email from Spok Mobile and you were not notified that someone invited you to use Spok Mobile, perform the following steps to set up Spok Mobile on your device:
- Download and install the application on your device. For detailed information on how to do this, please refer to How to Download and Install the Application.
- Sign up for the application. For detailed information on how to do this, please refer to How to Sign Up for the Application.
- Register the application on your device. For detailed information on how to do this, please refer to How to Register the Application.
How to Download and Install the Application
To manually download and install the application, either follow the download URL available in the registration email or, if you did not receive an email from Spok Mobile, download and install the application from from the Apple Application store.
Note: Your site administrator may have automatic installations of Spok Mobile set up using a Mobile Device Management (MDM) program. In this case, the mobile device receives the installation files and automatically installs Spok Mobile. If your device already has Spok Mobile installed, proceed to How to Sign Up for the Application (if applicable) and How to Register the Application.
Downloading the Application from the Registration Email
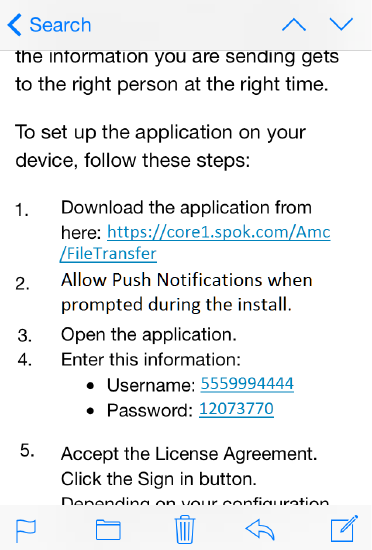
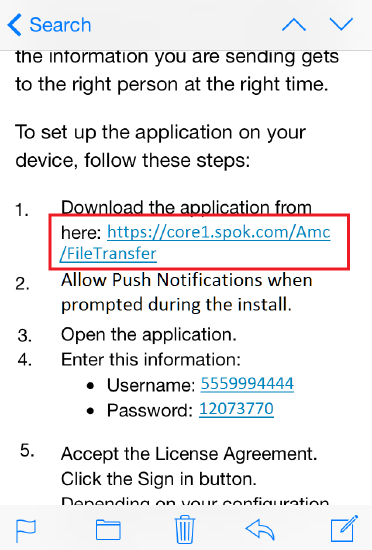
To download the application on your device, you can simply click on the download URL in the email that you receive from Spok Mobile. When you click on the download URL in the email that you receive from Spok Mobile, your device type should be automatically detected and the correct build automatically downloads on your device.
- Access the registration email that you receive from Spok Mobile on your device. The email displays.
-
Click on the download URL that is included in step #1. If the system can detect the type of device that is being used, the application automatically downloads onto your device.
-
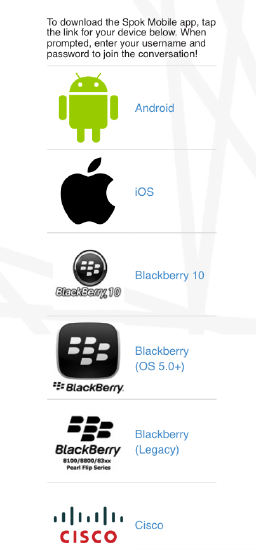
If the system cannot detect the type of device that you are using, you are directed to a site where you can choose the type of build that you would like to download. The following screen displays:
NOTE: Beginning with Spok Mobile version 4.4, Blackberry is no longer supported.
-
Click the link for the file that best describes your device type. The desired build automatically downloads on your device. If you are using a device that has iOS, click the Apple icon.
Downloading the Application from the Apple Application Store
You can choose to manually download the application from the Apple Application store. The information in this section shows you how to download the Spok Mobile application from the Apple Application store that can be accessed by clicking the App Store icon on your Apple device.
To download the application from the Apple Application store, perform the following steps:
-
Access the Apple Application Store by clicking the App Store button on your Apple device. The Apple Application Store displays.
-
In the Apple Application store, click the Search tab. The Search box displays.
-
In the Search box, enter “Spok Mobile”.
-
Click Search. Search results display.
-
From the search results, choose the Spok Mobile application. The Spok Mobile application’s page in the Apple Application store displays.
-
Next to the Spok Mobile application, click the GET button. The FREE button changes to an INSTALL button.
-
Click INSTALL. The application begins downloading. When the download is complete, the INSTALL button changes to an OPEN button.
-
Click OPEN. The Spok Mobile application opens.
How to Sign Up for the Application
If you do not have an existing registration of Spok Mobile, you can sign up to use the application.
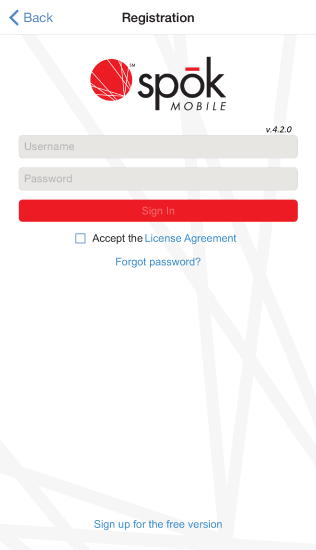
- Click the Spok Mobile icon on your device’s home screen. The Registration screen displays.
-
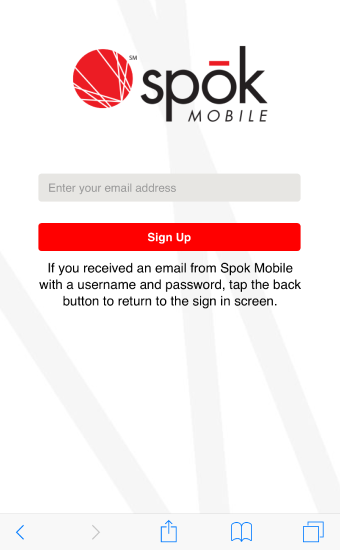
Click the Sign up for the free version link. The Sign Up screen displays in a web browser.
-
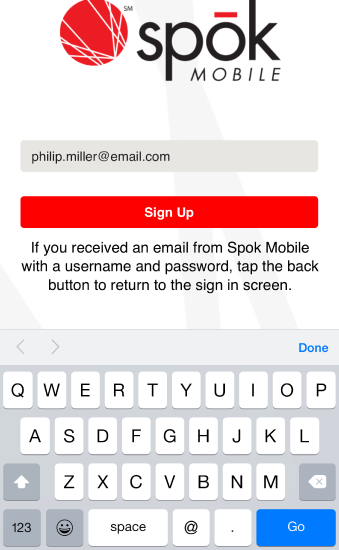
In the Enter your email address field, enter the email address that is associated with the device that will be used with Spok Mobile. For example, if the “Philip.Miller@email.com” email is linked to the device that you want to use for Spok Mobile, enter that email into the field.
-
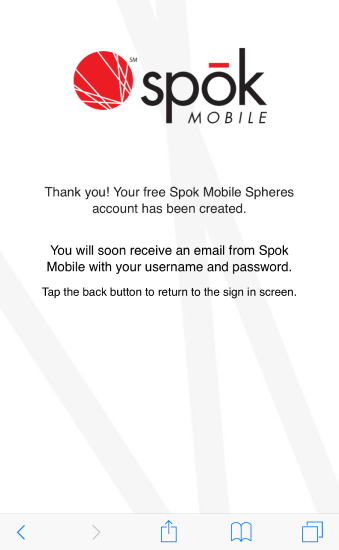
After an email address is entered, click Sign Up . After the Sign Up button is clicked, a registration code is sent to the entered email address. This registration code is used to register the Spok Mobile application on your device. After you receive the registration code, follow the instructions in the How to Register the Application to register the Spok Mobile application on your device.
How to Register the Application
Before the Spok Mobile application can be used on your device, the application must be registered.
NOTE: After you perform the original registration on your device, you may be required to re-register your device when changes are made to your site’s configuration.
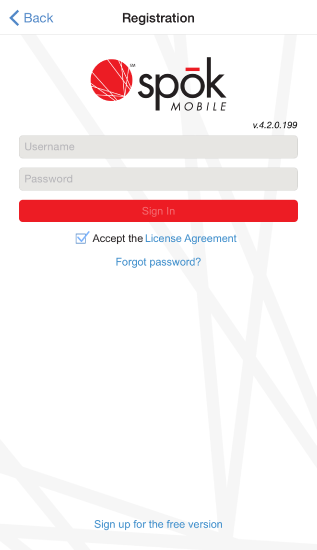
- Choose the Spok Mobile icon on your device. The Spok Mobile Registration screen displays.
- In the Username field, enter the username that is associated with your Spok Mobile account. This information can be found in the email that you receive from Spok Mobile.
- In the Password field, enter the password that is associated with the username that you entered in the Username field for your Spok Mobile account. This information can be found in the email that you receive from Spok Mobile.
NOTE: Please note that the password that you are assigned by the Spok Mobile application through email expires 24 hours after you are assigned that value or after you receive the email. If you wait over 24 hours to use your password or registration code to register Spok Mobile on your device, you must obtain a new password or registration code. To do this, you can click the Forgot password? link in the Registration screen. For detailed information on how to use this link, please refer to Accessing Your Registration Password When Not Registered.
- Enable the Accept the License Agreement option. When the option is enabled, a check mark displays in the box next to the field. Note that the License Agreement can be viewed by clicking the License Agreement link. You must agree to these terms before being able to sign in and use the application.
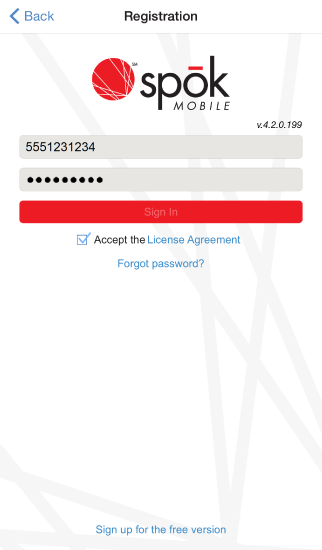
- Click Sign In.
Enabling Notifications
- A dialog displays.
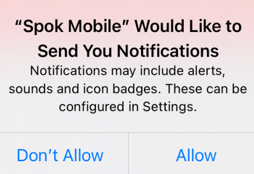
- Tap Allow. You will not receive Spok Mobile notifications if you tap Don't Allow.
Enabling Notifications in iOS 15
- If you are using an iOS device that has iOS 15 and has Scheduled Summary enabled, the following dialog displays.
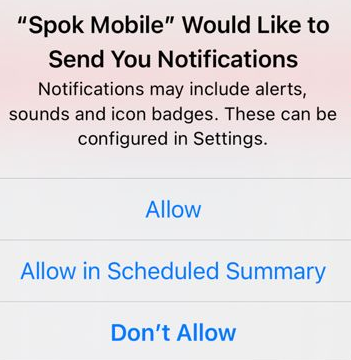
- Tap Allow Immediate Notifications. It is not recommended to add Spok Mobile to Scheduled Summary, and you will not receive Spok Mobile notifications if you tap Don't Allow.
Trusting Spok Mobile
- If you have not chosen to trust the Spok Mobile application on your device, the following dialog displays.
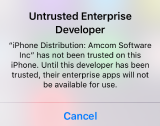
-
If this dialog displays, you must trust the Spok Mobile application on your device by performing the configuration steps in Configuring the Device to “Trust” Spok Mobile.
-
After these configuration steps are performed, you can sign into the Spok Mobile application again by clicking the Sign In button in the Registration screen.
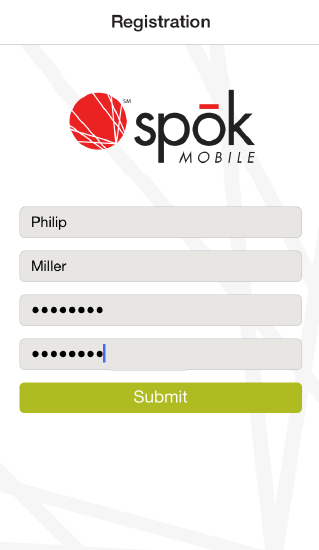
- Your device is registered with Spok Mobile; however, before the application can be used on your device, your profile information must be updated. The Registration screen displays.
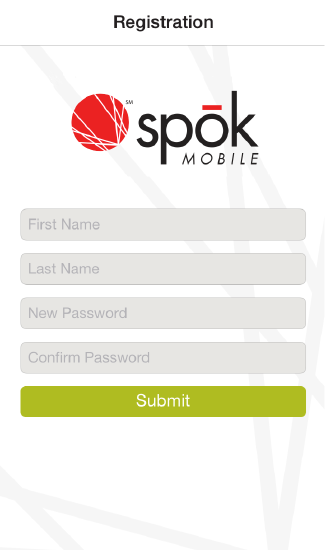
-
In the First Name field, enter your first name. This name will be associated with your Spok Mobile account. Please note that this value must be between one and 100 characters, and spaces cannot be used before or after the text but they may be used in the text.
-
In the Last Name field, enter your last name. This name will be associated with your Spok Mobile account. Please note that this value must be between one and 100 characters, and spaces cannot be used before or after the text but they may be used in the text.
-
In the Password field, enter a password that you would like to use to register Spok Mobile on your device. After this password is saved, it is used to re-register your device. Please note that this password must be between 8 and 32 characters and spaces cannot be used.
-
In the Confirm Password field, re-enter the password that you entered in the Password field. After this password is saved, it is used to re-register your device. Please note that this password must be between 8 and 32 characters and spaces cannot be used.
-
After all of the desired information is entered, click Submit . The changes are saved and the Spok Mobile application can now be used on your device. Please note that when the Spok Mobile displays on your device for the first time, you may receive messages from the Spok Mobile Team that provide you with introductory information about the product.
Re-Confirming a Registration
When the Spok Mobile application is updated on your device, you must re-confirm your registration in the system.
- After the Spok Mobile application is updated on your device, access the application by clicking the Spok Mobile icon on your device’s home screen. The Registration screen displays.
- Re-confirm your registration. Please note that the steps for re-confirming a registration (re-registering a newer or updated version of the application on your device) are the same as the steps for registering the application. For detailed information on how to register the application, please refer to How to Register the Application.
Configuring Required Device Settings
Before the Spok Mobile application can be successfully used on your Apple device, settings need to be configured.
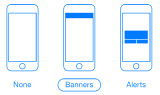
Depending on the operating system being used, the appearance of message notifications can be different. Spok Mobile notifications can be displayed in three different ways. For more information on how to change notification settings for Spok Mobile, please refer to Changing Notification Settings.
Enabling Wi-Fi Assist
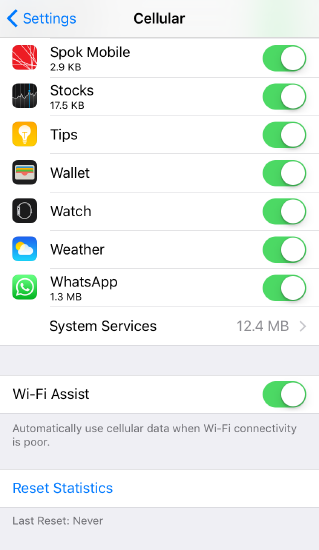
The Wi-Fi Assist feature on iOS 9 devices should be enabled on devices that are using Spok Mobile. Enabling this feature ensures that when your device does not have a quality Wi-Fi connection, the device uses its cellular data connection to establish or maintain an internet connection. Ensuring that your device has an internet connection helps with the sending and receiving of Spok Mobile message. It is important to note that when this option is enabled, your cellular data usage could increase.
- Choose the Settings option on the device. The Settings screen displays.
- In the Settings screen, choose the Cellular option. The Cellular option displays.
- In the Cellular screen, enable the Wi-Fi Assist option. The option becomes enabled.
Changing Notification Settings
In iOS 7 and later, you have the ability to set preferences for notifications that display on your device. These preferences can also be set for Spok Mobile notifications. For more detailed information on setting notification preferences in iOS, please refer to Apple’s product documentation at http://www.apple.com.
-
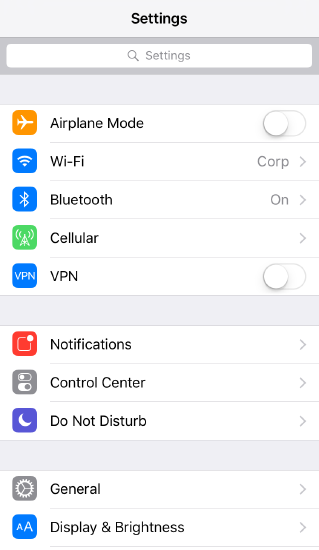
Click the Settings application on the iPhone’s home screen. The Settings screen displays.
- Choose the Notification Center option. The Notification Center screen displays.
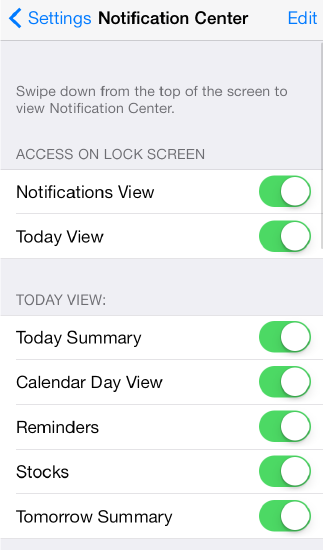
NOTE: Do not enable the Do Not Disturb option on your device. If the Do Not Disturb option is enabled on your device, you MAY NOT receive Spok Mobile messages.
- Scroll to the Spok Mobile option in the Notification Center screen.
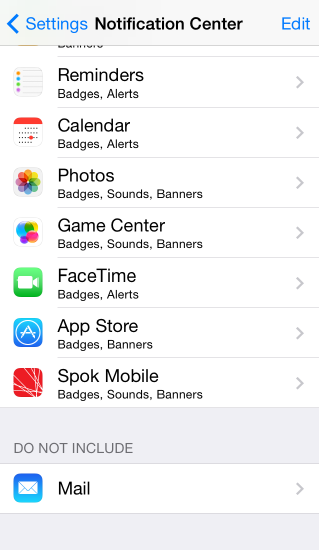
- Choose the Spok Mobile option. The Spok Mobile screen displays.

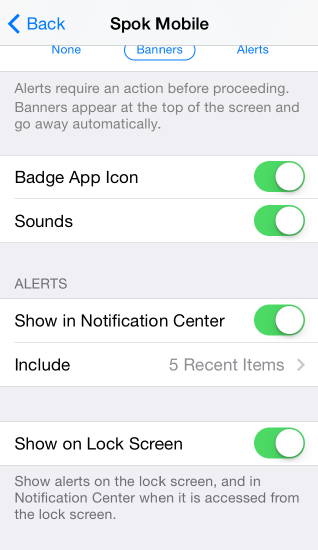
- Change any desired notification settings. Descriptions of each field and options within each field are described below.
|
Field |
Options |
|
Notification Center |
|
|
Show |
|
|
Alert Style |
None: Banners:
*Alerts:
|
|
Badge App Icon |
|
|
Sounds |
|
|
Show (View) in Lock Screen |
|


NOTE: Preference options with a “*” next to the option are the required configuration options for Spok Mobile.
- Click Notifications in the Spok Mobile screen to save the changes and return to the previous screen. Your changes are saved.
Managing Settings for iPads and iPods
When devices that use iOS but do not have cellular plans (iPads, iPods) are being used with Spok Mobile, specific settings must be configured to ensure that the device receives Spok Mobile messages at all times.
Configuring the Auto-Lock Feature
When Wi-Fi only devices such as iPads or iPods are used to receive Spok Mobile messages, they must be configured to refrain from locking. When devices that only have Wi-Fi connections are locked, the Wi-Fi connection is lost. Because of this, Wi-Fi only devices that are locked cannot receive Spok Mobile messages. When the device is configured to not lock, this ensures that the device receives all Spok Mobile messages that are sent to the device.
- Click the Settings application on the iPhone’s home screen. The Settings screen displays.
-
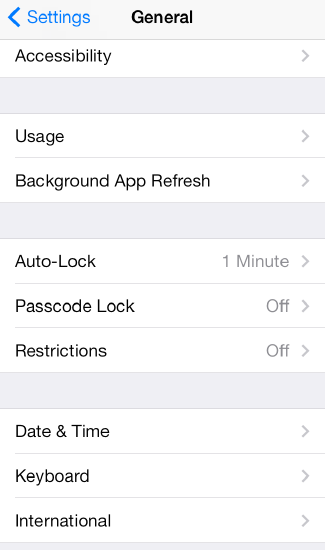
In the Settings screen, choose the General option. The General screen displays.

-
In the General screen, scroll to the Auto-Lock option. The Auto-Lock option displays.
-
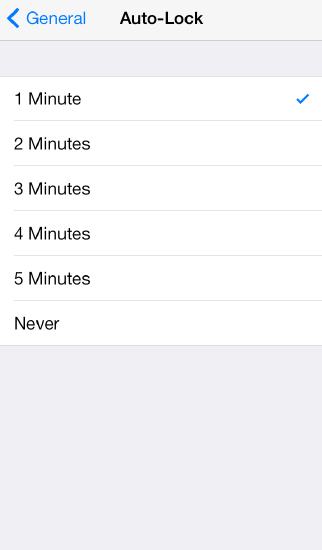
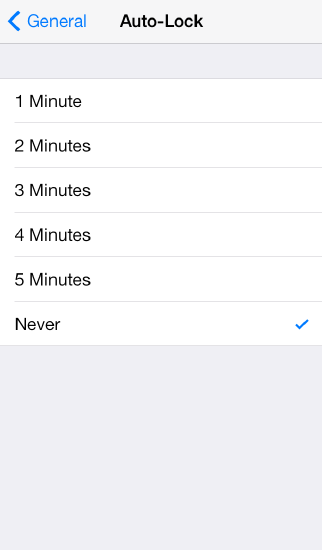
Choose the Auto-Lock option. The Auto-Lock screen displays.
-
In the Auto-Lock screen, choose the Never option. When the Never option is chosen, a check mark displays next to the option.
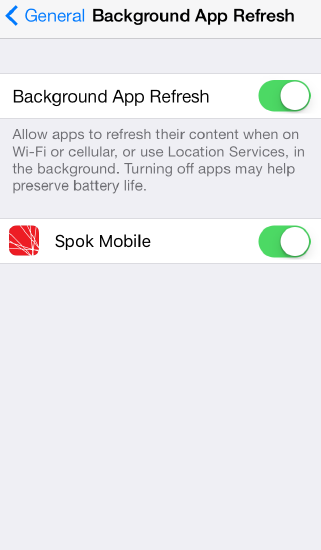
Configuring the Background App Refresh Feature
To ensure that Wi-Fi only devices receive all Spok Mobile messages, the Background App Refresh option must be enabled. When this option is enabled, applications that are installed on the Wi-Fi device have the ability to receive push notifications when the device is in sleep mode.
This option can also be enabled on devices that have a cellular internet connection. For example, if a device that has a cellular internet connection enters sleep mode, that internet connection can be lost. When the Background App Refresh option is enabled, the Wi-Fi connection on the device ensures that the device receives all push notifications when the device is in sleep mode.
NOTE: This feature is only available in iOS 7 and later versions of iOS.
-
Click the Settings application on the iPhone’s home screen. The Settings screen displays.
-
Choose the General option. The General screen displays.
-
Choose the Background App Refresh option. The Background App Refresh screen displays.
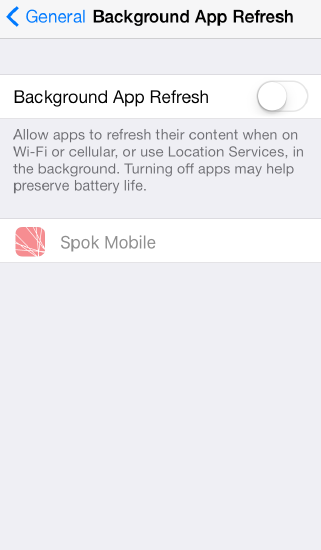
-
Enable the Background App Refresh option for the Spok Mobile application. The Background App Refresh option is enabled.
Configuring the Device to “Trust” Spok Mobile
Devices that are using iOS 9 and did not install the application from the Apple Application Store must “trust” the Spok Mobile application to ensure that all Spok Mobile messages are received on the device.
- Choose the Settings application on the device. The Settings screen displays.
-
Choose the General option. The General screen displays.
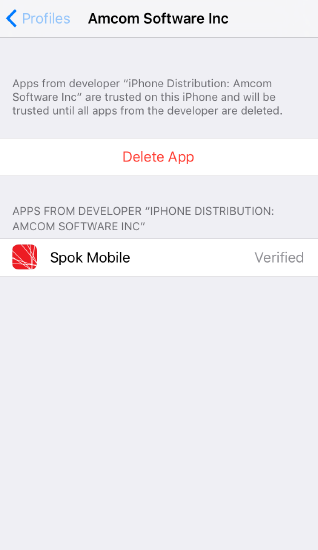
- Choose the Profiles option. The Profiles screen displays.
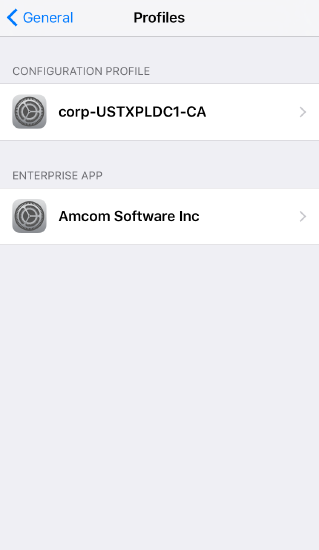
- In the Profiles screen, choose the Amcom Software Inc option. The Amcom Software Inc screen displays.
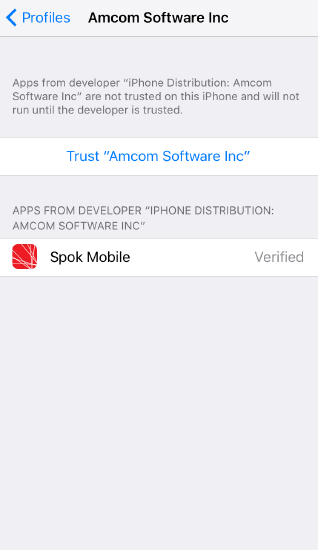
-
Choose the Trust “Amcom Software Inc” option. A warning dialog displays.
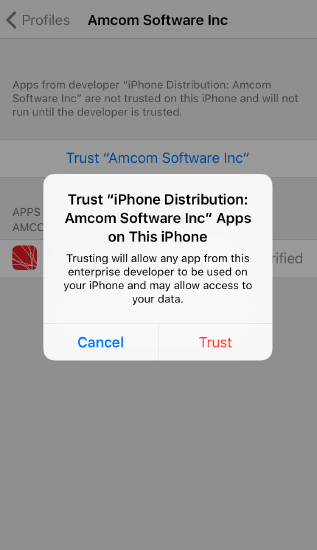
-
In the warning dialog, choose the Trust option. The device now trusts the Spok Mobile application.